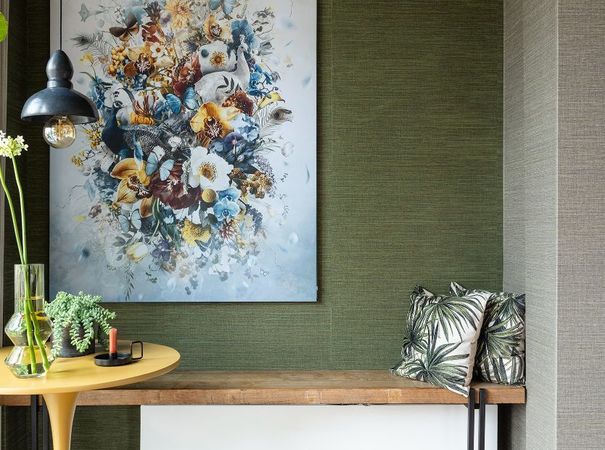
ArtFrame™ Manual
Just brought home a new ArtFrame? Here you'll find a selection of tutorials and videos explaining how to put together your ArtFrame.
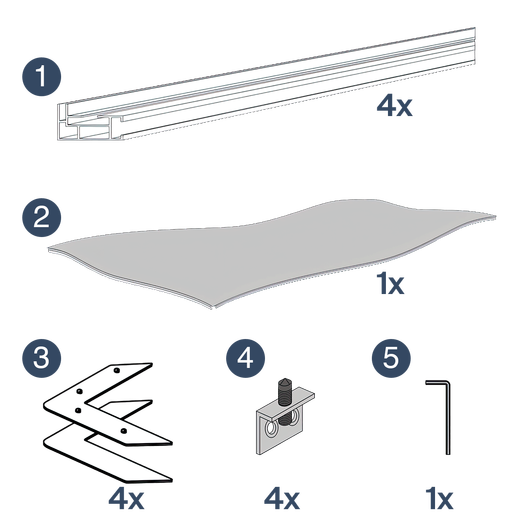
Included as standard
- ArtFrame frame parts (4 parts)
- Changeable Art Print – the artwork (1 part)
- Corner pieces (4 parts)
- Mounting brackets (4 parts)
- Allen key (1 part)
Optional: set of sound-absorbing panels, struts (depending on the format of the ArtFrame).
Video
- ArtFrame frame parts (4 parts)
- Changeable Art Print – the artwork (1 part)
- Corner pieces (4 parts)
- Mounting brackets (2 parts)
- Allen key (1 part)
Step 1: Lay the frame out on the ground
Lay out the parts of the frame
Place the frame parts on a table or on the ground. Pay attention to which is the front and which is the back of the frame.
You can identify the front because this is the open part of the frame. It is here where the canvas is inserted.
The back, on the other hand, is the closed side of the frame where the canvas cannot be inserted.
Step 2: Slide the corner pieces into the frames and secure them tight
2.1 Corner pieces
Lay the two different corner pieces on top of each other. Place the one without screws at the bottom.
2.2 Positioning the corner pieces
Slide the pieces that are lying on top of each other into the frame and slide the other frame over the free corner piece.
2.3 Final frame part
For the final frame part, you will need to position both corner pieces. You will then slide these into the already joined frame parts.
2.4 Tightening
Use the Allen key provided to tightly secure the corner pieces. Make sure that the frame parts are sitting as tightly together as possible. This will result in the best effect.
Step 3: Screw the mounting brackets to the wall
3.1 On the wall
Drill holes in the appropriate place (option to use a wall plug, depending on your wall) and tightly screw on the mounting brackets.
Once you've hung the frame, you can easily tighten the screws and adjust the frame so that it is level.
First, place the top mounting brackets. After you have hung the assembly, you can place the additional mounting brackets at the bottom so that the assembly hangs tightly against the wall
3.2 Hanging the frame
Place the frame over the brackets and your frame will hang there!
3.3 Adjusting level
Use the Allen key to help you hang the frame level.
By tightening one of the screws, you will be able to adjust the frame so that it is level.
Step 4: Stretch across the changeable Art Print
4.1 Positioning the print
First push the rubber string into the four corners of the ArtFrame and then push the long sections into place.
Tip: In the videos under 4.2 and 4.3, you will see an example of how to correctly position the canvas and how to incorrectly position it.
4.2 Correct placement
When you've positioned the print correctly, you won't be able to see any of the white rubber string at the front of your ArtFrame.
4.3 Incorrect placement
Tip: If you can see the white rubber string at the front of your ArtFrame, then you haven't positioned the print correctly.
Step 5 (optional): Position the sound-absorbing panels in the frame
5. Installing the optional sound-absorbing panels
Place the acoustic panels with the harder side against the wall.
The fabric keeps the panel in place. Stretch the fabric a little and slide the panel behind it to keep it in place.
Step 6 (optional): Position the struts
6.1 Struts
Struts are included with extra-large ArtFrames. They offer a bit of additional stability and stop the frame from sagging.
6.2 Brackets
Insert the screws and the connecter into the brackets. Use the Allen key provided.
6.3 Screwing
Slide the bracket into the frame and screw it tight. Use the Allen key provided.
Step 7 (optional): Connector Profile
7.1 Frame Sections
Did you order an ArtFrame™ larger than 170 cm? In that case, your frame consists of more than 4 frame sections. This provides a sturdier construction and also makes shipping easier. Don’t worry, in the following steps you can easily assemble the frame.
7.2 Insert the Profile
Your package includes additional frame sections and connector profiles. Slide the profile into the open end of a frame section. Then slide the next frame section onto the other end of the profile. The two frame sections are now connected.
7.3 Tighten
Use the included Allen key to securely tighten the connector profile. Make sure the frame sections fit together as tightly as possible – this ensures the frame is sturdy and gives it a clean, seamless appearance.
Enjoy your new ArtFrame
You can now enjoy your new ArtFrame.
Switch out the print!
The great thing about an ArtFrame is that – as you've just discovered – it's really easy to position the print. This means you can easily order a new print and switch up the mood of your room in an instant.
Maybe go for a fun Christmas print at Christmas or that perfect holiday photo after your summer holiday. Or surprise somebody in your home on their birthday with a cool cake.
Tip: Keep hold of your old canvas because once you've had a go at changing it, you'll want to do it every week!